In the section Settings > System > Email Settings, you need to add the email address that the program will check for incoming invoices.
In the “Add email” window, enter the email address and password. Set Mailbox type → IMAP.
Enter the server, port, and protocol according to your email service provider’s settings. These are usually available in the sections Incoming mail settings or IMAP settings of your email service.
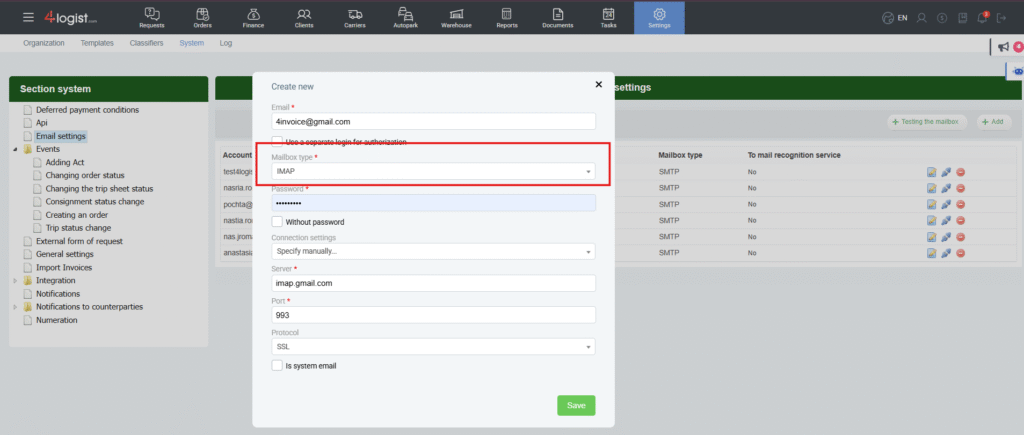
Examples of settings:
For Gmail:
Server: imap.gmail.com
Port: 993
Protocol: SSL
After adding incoming mail, you need to check that the settings are correct. To do this, click on the cloud icon, which is displayed only for incoming mail.
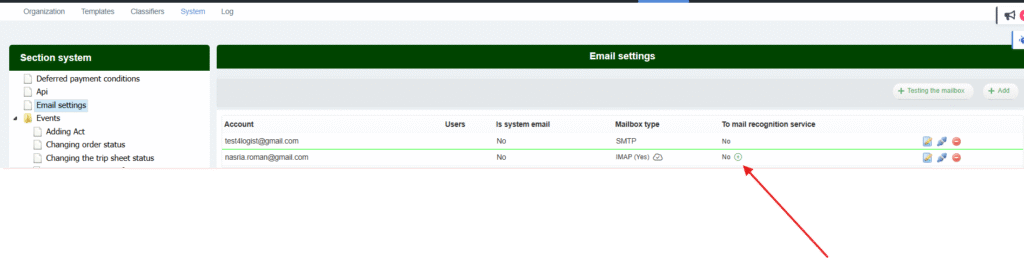
If the settings are correct, the text ‘Yes’ will appear in the ‘Mailbox type” section. In the “To Mail Recognition service” section, the ‘ + ‘ icon will appear to enable importing invoices from this mail. Click on this icon.
After that, the program will check this email and automatically transfer incoming invoices to the program and correlate them with expenses.
For more information about how invoice import works, see Import Invoices
Was this helpful?
0 / 0